Wreath Making with Arthur Parkinson
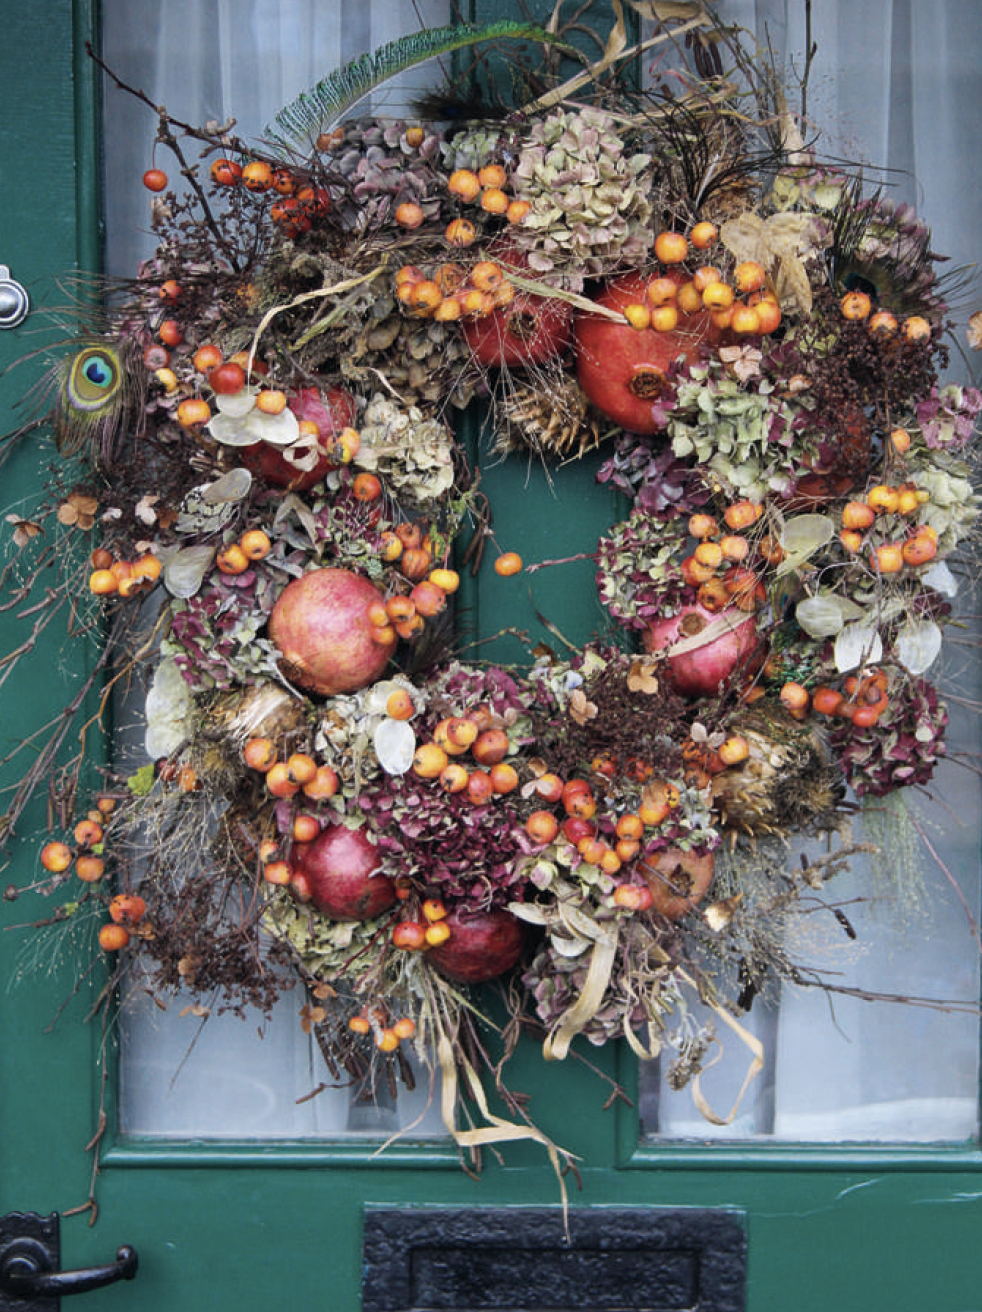
A late hanging is essential for a keeping a wreath looking really fabulous, so make one as close to when it is needed as time allows. Most people arrive at festivities sober
rather than drunk; they will notice if your ivy is limp! The base of a wreath is the most important thing to get right and here moss is key. Raking yours, or in my case someone else’s, lawn is the best way to collect your moss (and a good workout, too). Hand-raked lawn moss is much better than the pricey, stringy sphagnum sort that may well have come from an endangered, far-flung peat bog.
Use a springbok rake and you’ll be amazed at how much moss can come out of a lawn, albeit one that has not had feed and weed applied to it. This scarifying job
boosts the grass by letting in light and air, so it is a win for both you and the lawn. You will want at least a good bucket’s worth. The moss should be damp, but not soaking wet. Moss, when wired onto the copper ring thickly and tightly, can then hold a huge amount of foliage. The copper ring will last a lifetime, and when you dismantle the wreath later, you can keep it for another time and the old moss can be thrown out in the spring for blue tits and blackbirds to use for their nests. So, to build the wreath, first tie a wheel of florist wire onto the copper base and attach the wreath’s hanger – choose some bright but strong ribbon. Then pat on a generous handful of moss and wire over and under the clump tightly. Having the wreath ring halfway over the edge of a table is helpful for this.
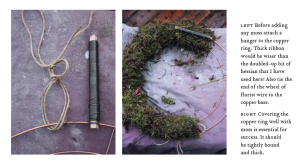
Keep pulling the wire firmly as you go around each clump of moss, so that it is held tight and packed closely. Go over it again and again. Give it a good shake to be sure that it has all been wired tightly; you want it so that you cannot poke your finger through it. Once the copper ring is completely covered over with moss, cut off the florist
wire and tuck its end into the base. Now you can begin to add the wreath ingredients. I like to use hydrangeas and fruit. I want it to be full and a bit bonkers.
Red apples, pomegranates and plums, always in clutches of threes or fives dotted around, act like focal points. I find it easier to get such large and heavy fruits attached first, before adding anything else. Pomegranates get a fake stem. First pierce them with a knitting needle, then shove a small but firm branch halfway up their middles. I cut the end of the branch to a point and then push it through the moss until it comes out the other side, then this is wrapped with florist wire and tied under the moss to the copper ring.
Around the pomegranates shove in some short but strong branches of birch or anything twiggy. These will act like a clawed hand, helpfully cupping the fruit in case any start to dangle downward once the wreath is hung. With smaller fruits, such as plums and limes, you can use the traditional wired T-junction method. Make sure you buy as firm fruit as possible, then attach these by poking a piece of thick, green florist wire up the fruit’s centre, then another through it horizontally. Then bend the ends that are sticking out on either side of the fruit slowly downward, so that they meet the vertical wire underneath, and twist them all together. Again, this creates a stem that can be shoved into the moss. You might be able to find some crab apple branches with the fruit still attached; these save work, but some will drop off!
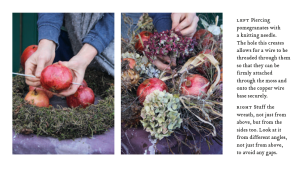
Once the big fruits are all in place you can radiate out from them with the foliage. Imagine you are doing floral fascinators that then all join up together. With the foliage, start off using small bits to densely cover the outside and the inside of the wreath’s ring; do not just view it from above, but give attention to the sides, too.
Foliage that looks good and lasts well includes berried ivy, eucalyptus and shiny Portuguese laurel – never spruce! If you can pick these the day before and submerge
them all in the kitchen sink for a few hours, it will really help them last for a good couple of weeks.
A few dozen or so branches, ones covered in lichen if you can forage them, and some silver birch can go into the wreath, too. These should be wiggy and messy
but not too long, as you just want to create a crest around the dense foliage layer. If I find that I am struggling to get anything into the moss, I make a hole in it first
with scissors.
Hydrangeas, with their huge heads, mean that a wreath can be covered quickly, so if you have dried plenty you can almost just use these. They can be stuck into
the moss base easily, but it is wise to wire each one to the copper ring as they are so light that the stem ends push out. The dried heads of cardoons look beautiful too
and are easily pushed in with their big, woody stems, but if they get wet they will soon fall apart.
Peacock, pheasant and guineafowl feathers can look good, too, used sparingly (I have so far resisted flamingo or scarlet ibis feathers). Again, feathers are best having
their ends wrapped with a piece of florist wire in order to attach them to the moss. Lastly, fronds of panicum grass can make anything that is looking on the dreary
side more interesting. Attaching them is difficult, however, as their dried stems snap easily when pushed into the moss, so it is best to add them at the last minute. You
can push them in among everything else, so that they cling like fancy cobwebs!
Autumn is arguably the best time in terms of finding material for making huge and spectacular wreaths for celebrations such as Thanksgiving and Halloween before winter sets in. Regardless of the season, the same method of mossing up a copper ring can be used. Live flowers can be added to a wreath as reusable water-holding
flower tubes can be pushed into the moss. The peeking tops of these little vessels can then be hidden with foliage. Never use hideous oasis!
This is an extract from The Flower Yard: Growing Flamboyant Flowers in Containers by Arthur Parkinson


